Sword Art Online Hollow Fragment : Implement Guide

➟ Sample - Ideal Satandart for High-Rank Players
ตัวทดสอบ
Complete a Hollow Mission
ทำมิชชั่นอะไร ระดับไหนก็ได้ 1 ครั้ง
ปลดล็อคระดับต่อไป ได้ Hollow Point เป็นรางวัล
➟ ➠ Data Collection - Burst Attack
Preform Specified number of burst attacks
ใช้ Burst Attack 20 ครั้ง ในมิชชั่นระดับ 1 ขึ้นไป
(Burst Attack คือการโจมตีที่กดปุ่มวงกลมนั่นแหล่ะ)
➟ ➠ ➣ Assessment - Ideal Risk Control Skill
Complete Hollow Mission within risk 3
ทำมิชชั่นระดับ 3 ให้จบด้วยค่า Risk (ข้าง ๆ เกจ Burst) เท่ากับ หรือต่ำกว่า 3 จำนวน 1 ครั้ง ในมิชชั่นระดับ 1 ขึ้นไป
(วิธีคือ ไปหามิชชั่นระดับ 3 ง่อย ๆ แล้วสั่งเพื่อนตี ส่วนเรายืนเอ๋อแดกไปให้ค่า Risk ลดลง ก็จบแล้ว ส่วนมากจะเป็นบอสง่อย ๆ ที่เคยเจอในตอนแรก พาพรรคพวกไปกันเยอะ ๆ ปล่อยเพื่อน ๆ ตีแล้วเรายืนรอมันตายเอาก็พอ)
ได้รับ Hollow Point เป็นของรางวัล
➟ ➠ Mastery of Chaining Powerful Sword Skills
Cast the Join Sword Skill with partners
ทำ Chain Skill กับพาร์ทเนอร์ (ให้พาร์ทเนอร์ใช้สกิลแล้วเราใช้สกิลต่อในจังหวะที่ถูกต้อง) จำนวน 1 ครั้ง ในมิชชั่นระดับ 1 ขึ้นไป
ปลดล็อคระดับต่อไป ได้ Hollow Point เป็นรางวัล
➟ ➠ ➣ Data Collection - Switch Viability
Cover each other during Recovery Time caused by Switch
สวิตซ์ (คำสั่งกดปุ่มลง) เพื่อสลับตำแหน่งกับพาร์ทเนอร์ระหว่างที่พาร์ทเนอร์สกิลล็อค จำนวน 1 ครั้ง ในมิชชั่นระดับ 1 ขึ้นไป
ปลดล็อคระดับต่อไป ได้ Hollow Point เป็นรางวัล
➟ ➠ ➣ ➢ Improve Spirits and Optimize Partners
Carry out GOOD
กดชมพาร์ทเนอร์ (ลูกศรขึ้น) ในจังหวะที่พาร์ทเนอร์ใช้คอมมานด์ต่าง ๆ (มีไอคอนทางซ้ายขึ้นเช่น โจมตี รูปดาบ บัฟรูปประกายแสงเขียว ป้องกัน รูปโล่) จำนวน 1 ครั้ง ในมิชชั่นระดับ 1 ขึ้นไป
ได้ Hollow Point เป็นรางวัล
=======*•-•*=======


➟ Post-Implement Check - Burst Attack
Preform Specified number of burst attacks
ใช้ Burst Attack 40 ครั้ง ในมิชชั่นระดับ 1 ขึ้นไป
(Burst Attack คือการโจมตีที่กดปุ่มวงกลมนั่นแหล่ะ)
ปลดล็อคระดับต่อไป ได้ Hollow Point เป็นรางวัล
➟ ➠ Assessment - Burst Temperance
ใช้ Burst Attack 400 ครั้ง ในมิชชั่นระดับ 1 ขึ้นไป
(Burst Attack คือการโจมตีที่กดปุ่มวงกลมนั่นแหล่ะ)
**เทคนิค เข้า Hollow Mission แล้ววิ่งไปตีตัวอื่นในแผนที่ให้เสร็จ ถ้าเวลาใกล้หมดค่อยไปตีตัวหลักก็ได้**
หลังทำเสร็จได้สกิลบัฟ Burst Temperance
➟ ➠ ➣ Vendors - Burst Attack-Influencing Gear
Preform Specified number of burst attacks
ใช้ Burst Attack 250 ครั้ง ในมิชชั่นระดับ 1 ขึ้นไป (ต้องกดในตอนที่เกจ Burst มีด้วยนะ)
(Burst Attack คือการโจมตีที่กดปุ่มวงกลมนั่นแหล่ะ)
หลังทำเสร็จจะมีไอเท็มชิ้นนี้ขายในชั้น 80/83/86/89
Burst Attack-Influencing Gear
Burst Attack Power +10% / ACC +15
➟ ➠ ➣ ➢ Costly Power Ring
Preform Specified number of burst attacks
ใช้ Burst Attack 100 ครั้ง ในมิชชั่นระดับ 1 ขึ้นไป (ต้องกดในตอนที่เกจ Burst มีด้วยนะ)
(Burst Attack คือการโจมตีที่กดปุ่มวงกลมนั่นแหล่ะ)
หลังทำเสร็จจะมีของดรอปจากมอน NM inferno Sword ที่ดัน Aincard ชั้น 94
Costly Power Ring
Defense+15 STR+20 VIT+5 AGI+5 DEX+5 EVA+5
Effect : Burst attack up (+30%)/Accuracy down (-10)
➟ ➠ ➣ ➢ Unlock - New Skill, Black Howling Assault
Use Sword Skills
ใช้ Sword Skill 300 ครั้ง ในมิชชั่นระดับ 2 ขึ้นไป
(*เทคนิค* กด LR เข้าเมนูสกิล ไปที่สกิล Exact onslaught กดสามเหลี่ยม ใช้ Exact onslaught แล้วกด LR เข้าเมนูสกิลเพื่อกลับไปกด Exact onslaught อีก สลับกันไปเรื่อย ๆ จนกว่าจะครบ)
ได้สกิลดาบสองมือ Black Howling Assault

กดดูคลิปวิธีปั๊ม
=======*•-•*=======

➟ Utility Assessment - Exact Attacks
Perform specified number of Exact Attacks
มันก็คือใช้ Burst Attack 50 ครั้ง โดยต้องมีเกจ Burst ด้วยนั่นแหล่ะ ในมิชชั่นระดับ 1 ขึ้นไป
ปลดล็อคระดับต่อไป ได้ Hollow Point เป็นรางวัล
➟ ➠ Assessment - Exact Attack ACC Buff
Perform specified number of Exact Attacks
มันก็คือใช้ Burst Attack 50 ครั้ง โดยต้องมีเกจ Burst ด้วยนั่นแหล่ะ ในมิชชั่นระดับ 1 ขึ้นไป
ปลดล็อคระดับต่อไป
➟ ➠ ➣ Fairy King's Gauntlets
Defeat Specified number of NM or HNM monster
จัดการมอนระดับ NM หรือ HNM 30 ตัว ในมิชชั่นระดับ 2
*เทคนิค* ไป Area : Sea of trees area at Serpentis ที่ Bridge to Bastea Gate เลย
Mision : Black-Winged Assailants จัดการ NM Alies Noire แค่ 2 ตัว แล้วเดินข้ามสะพานไป แล้วกลับมาเข้า Mission ใหม่
คลิปตัวอย่างวิธีทำ
หลังทำเสร็จจะดรอปจาก NM Blaze Dragon ใน Aincard ชั้น 81
Fairy King's Gauntlets
Defense+24 ACC+20
Effect : Exact Attack Accuracy up (+20)
=======*•-•*=======

➟ Implementation - Original Sword Skill System (OSS)
Perform specified number of sword skill
ใช้ Sword Skill 200 ครั้ง ในมิชชั่นระดับ 1 ขึ้นไป
**ใช้วิธีปั๊มแบบเดียวกับข้อ 2.1.3**
ปลดล็อคระดับต่อไป ได้ Hollow Point เป็นรางวัล
➟ ➠ From Sword Skill to Sword Skill
Test Sword Skill on Lv.100 or Higher enemeies
ให้ไปใช้ Sword Skill กับมอนเลเวล 100 ขึ้นไป 800 ครั้ง ในมิชชั่นระดับ 1 ขึ้นไป
**ใช้วิธีปั๊มแบบเดียวกับข้อ 2.1.3**
ปลดล๊อค OSS สามารถใช้การ Chain Skill ได้แล้ว
(จะมีจุดวาร์ปเพิ่มเข้ามาในห้องควบคุม เพื่อบันทึกก่อนเอาไปใช้ การบันทึก OSS Chain Skill ให้กดสกิลที่จะเชนตอนจังหวะมีแสงสีม่วงปรากฏตอนใช้สกิล แต่เวลาเอาไปใช้จริง ให้กดหลังแสงสีม่วงปรากฏ งงมะ? เออ มันเป็นแบบนี้แหล่ะ กว่าจะบันทึกสกิลได้ลำบากมาก กะจังหวะไม่โดน)
ปลดล็อคระดับต่อไป ได้ Hollow Point เป็นรางวัล
➟ ➠ ➣ Assessment - Damage Modifiers
Test run of 2-Step OSS Chain against Lv.110+ foe
ให้ไปใช้ OSS แบบ Chain 2 สกิล ใส่มอนเลเวล 110 ขึ้นไป 20 ครั้ง ในมิชชั่นระดับ 1 ขึ้นไป
(ตั้งสกิลง่าย ๆ ไว ๆ ไปปั๊มเอาให้ผ่านก็พอ เข้ามิชชั่นอะไรก็ได้ แล้วไปเดินหามอนเลเวล 110+ ในแผนที่เพื่อทำ)
ปลดล็อคระดับต่อไป ได้ Hollow Point เป็นรางวัล
➟ ➠ ➣ ➢ Unlock - Multiple Sword Skill Chaining with OSS
Test run of2-Step OSS Chain against Lv.120+ foe
ให้ไปใช้ OSS แบบ Chain 2 สกิล ใส่มอนเลเวล 120 ขึ้นไป 100 ครั้ง ในมิชชั่นระดับ 2 ขึ้นไป
ได้ เพิ่มการ Chain สกิลมากกว่า 2 ครั้ง (สูงสุด 5 สกิล)
ทริค วิธีเก็บ implement เชนสกิล แบบที่ 1
สำหรับคนเลเวลสูง ๆ แล้ว หรือโอนเซฟมาจาก PSV
มอนธรรมดาตายง่ายเกินไป ต้องไปจัดระดับบอส HNM
ทริค วิธีเก็บ implement เชนสกิลแบบที่ 2
ต้องไปถึง Alevaste Otheworld Area และทำ Level Area ถึง 3 ก่อน
จะมี Mission : Born from the Nightmare of Chaos
ให้เข้ามิชชั่นแล้วไปยืนเล็งไข่แมลงเชนสกิลห่าง ๆ บอสช่างหัวมันปล่อยมันเดินเล่นของมันไป
➟ ➠ 10% Recast Reduction on Chaining Sword Skills
Complete Specified number of 3-Step OSS Chains
ให้ไปใช้ OSS แบบ Chain 3 สกิล 30 ครั้ง ในมิชชั่นระดับ 1 ขึ้นไป
ได้ ลดดีเลย์สกิลลง 10%
*ใช้วิธีเก็บแบบเดียวกับข้อ 4.1.1.1*
➟ ➠ ➣ 20% Recast Reduction on Chaining Sword Skills
ให้ไปใช้ OSS แบบ Chain 4 สกิล 40 ครั้ง ในมิชชั่นระดับ 2 ขึ้นไป
ได้ ลดดีเลย์สกิลลง 20%
*ใช้วิธีเก็บแบบเดียวกับข้อ 4.1.1.1*
➟ ➠ ➣ ➢ 30% Recast Reduction on Chaining Sword Skills
ให้ไปใช้ OSS แบบ Chain 5 สกิล 50 ครั้ง ในมิชชั่นระดับ 3 ขึ้นไป
ได้ ลดดีเลย์สกิลลง 30%
*ใช้วิธีเก็บแบบเดียวกับข้อ 4.1.1.1*
(รวมกับของเก่าทั้งหมด = ลดดีเลย์ไป 50%)
=======*•-•*=======


➟ Room for Development - Technical Stab System
Exact step away from set number of enemy skill
ให้ใช้ Step Away คือกดลง+ปุ่ม X เพื่อหลบการโจมตีด้วยสกิลของมอน 20 ครั้ง ในมิชชั่นระดับ 1 ขึ้นไป
(ถ้าหลบด้วย Step Away ได้จะมีแสง และโบนัสบัฟขึ้น)
ปลดล็อคระดับต่อไป ได้ Hollow Point เป็นรางวัล
➟ ➠ To Add - Aftereffects for side steps
Exact Step away from set number of enemy skills
ใช้ Step Away หลบสกิลมอน 50 ครั้ง ในมิชชั่นระดับ 1 ขึ้นไป
ปลดล็อคเอฟเฟ็คหลังจากการหลบสำเร็จ
➟ ➠ ➣ Dark Assassins
Activated rear CRT effect a set no of times
โจมตีติดคริจากด้านหลังของศัตรู 100 ครั้ง ในมิชชั่นระดับ 1 ขึ้นไป
ได้ถุงมือ Dark Assassins ดรอปจาก NM Roughneck ใน Aincrad ชั้น 76
Dark Assassins
Defense+20 DEX+5 ACC+30
Effect : Rear CRT Up+10
➟ ➠ ➣ ➢ Blitzsting : Armorbreaker
Activate rear CRT effect a set no. of times
โจมตีติดคริจากด้านหลังของศัตรู 200 ครั้ง ในมิชชั่นระดับ 2 ขึ้นไป
ได้มีดสั้น Blitzsting : Armorbreaker ดรอปจาก NM Scorbius ใน Aincrad ชั้น 98
Blitzsting : Armorbreaker
Defense-10 DEX+45 ACC+20
Effect : Rear CRT up+10 / Rear ATK +20 / Defense-20%
➟ ➠ ➣ ➢ ➤ Unlock - New Skill, Gravity Magnum
Perfrom specified number of sword skill tests
ใช้ Sword Skill 300 ครั้ง ในมิชชั่นระดับ 2 ขึ้นไป
**ใช้วิธีปั๊มแบบเดียวกับข้อ 2.1.3**
ได้สกิลใหม่ของมีดสั้น
➟ ➠ To Add - Aftereffects of Backsteps
Evade skill with Extract Back-Steps a set no. of times
หลบการโจมตีด้วย Back-Step 20 ครั้ง ในมิชชั่นระดับ 1 ขึ้นไป
ปลดล๊อคเอฟเฟ็คหลังจากการหลบการโจมตีสำเร็จ
➟ ➠ ➣ Gorger : Maneater
Use set no. of stun attacks against Lv120+ foes
ใช้สกิลที่ทำให้ stun 250 ครั้ง ในมิชชั่นระดับ 1 ขึ้นไป
(มีอยู่ 2 สกิล รอดีเลย์กันยาวเลยทีนี้)
ได้มีดสั้น Gorger : Maneater ดรอปจาก HNM Dullahan Halberdier ใน Aincrad ชั้น 84
Gorger : Maneater
STR+35 ACC+10
ATK on Stunned foe+45% / 5% HP absorb
➟ ➠ ➣ ➢ Effect Assessment - Piercing Legacy
Use a set number of stun attacks against enemies
ใช้สกิลที่ทำให้ stun 300 ครั้ง ในมิชชั่นระดับ 2 ขึ้นไป
(มีอยู่ 2 สกิล รอดีเลย์กันยาวเลยทีนี้)
ได้สกิลบัฟใหม่ (Attack on stun +60% / Rear CRT 30% / DEF -50%)
➟ ➠ ➣ ➢ ➤ Wrathblade : Fragarach
Activate rear CRT effect a set number of times
โจมตีติดคริจากด้านหลังของศัตรู 300 ครั้ง ในมิชชั่นระดับ 3 ขึ้นไป
ได้มีดสั้น Wrathblade : Fragarach ดรอปจาก HNM Dynamic Blaster ใน Aincrad ชั้น 82
Wrathblade : Fragarach
Attack+100 AGI+35 DEX+35
Effect ATK on stunned foe +80% / Rear CRT 20% / DEF 0
=======*•-•*=======


➟ Assessment - Risk Reduction Methods
Defeat set no.of Lv.80+ enemies w/ Risk 1 or less
ให้ฆ่ามอนเลเวล 80 ขึ้นไปด้วยค่า Risk 1 หรือต่ำกว่า 20 ครั้ง ในมิชชั่นระดับ 1 ขึ้นไป
(เข้ามิชชั่นไหนก็ได้ แล้วไปตีมอนตัวอื่นในแมพ พอโจมตีแล้วปล่อยฟันธรรมดาไปค่า Risk จะลด หรือถ้า Side Step หลบจังหวะสกิลได้ค่า Risk จะลดลงเหลือ 0 เอง แต่ถ้าใช้สกิลโจมตีค่า Risk จะเด้งเป็น 5 ทันที)
ปลดล็อคระดับต่อไป ได้ Hollow Point เป็นรางวัล
➟ ➠ To Remove - Increased Risk During Quick-Step Dodging
Exact Step away from set number of enemy skills
ให้ใช้ Step Away คือกดลง+ปุ่ม X เพื่อหลบการโจมตีด้วยสกิลของมอน 80 ครั้ง ในมิชชั่นระดับ 1 ขึ้นไป
(ถ้าหลบด้วย Step Away ได้จะมีแสง และโบนัสบัฟขึ้น)
➟ ➠ ➣ Awakening Crystal
Complete set number of mission with low risk
ทำมิชชั่นผ่านด้วยค่า Risk ต่ำ ๆ 10 ครั้ง ในมิชชั่นระดับ 1 ขึ้นไป
เป็นไอเท็มขายในชั้น 81
➟ ➠ ➣ Effect Assessment - Entire Fortune
Defeat NM with faster risk recovery
กำจัดมอนระดับ NM ด้วยการลดค่า Risk อย่างรวดเร็ว 10 ครั้ง ในมิชชั่นระดับ 1 ขึ้นไป
(เข้ามิชชั่นรอจังหวะมอนโจมตีแล้ว Side Step จะลดได้เร็วที่สุด)
ได้สกิลใหม่ X3 Risk Recover when not target
➟ ➠ ➣ Seven-Footed Rabbit Charm
Defeat NM-class monster
กำจัดมอนระดับ NM 20 ตัว ในมิชชั่นระดับ 2 ขึ้นไป
**ใช้เทคนิคเดียวกันกับข้อ 3.1.1**
หลังทำเสร็จ จะเป็นของดรอปจาก NM Anemoi Queen ใน Aincard ชั้น 91
➟ ➠ ➣ ➢ Unlock - New Skill, Ripping Massacre
Perform specified number of sword skill tests
ใช้ Sword Skill 300 ครั้ง ในมิชชั่นระดับ 2 ขึ้นไป
**ใช้วิธีปั๊มแบบเดียวกับข้อ 2.1.3**
เป็นสกิลของดาบ Scimitar
=======*•-•*=======


➟ Sacrifices for Powerful Effects
Complete specified number if Hollow Mission
ทำมิชชั่นระดับ 1 ขึ้นไป 5 ครั้ง
เมื่อทำเสร็จ เป็นบัฟที่ทำให้ติด Bleed 1500 แต่ได้ Attack +30%
ปลดล็อคระดับต่อไป ได้ Hollow Point เป็นรางวัล
➟ ➠ Effect Assessment - Lover's Sacrifice
Defeat specified number of Lv.110+ enemies
กำจัดมอนเลเวล 110 ขึ้นไป 200 ตัว ในมิชชั่นระดับ 1 ขึ้นไป
ได้สกิลใหม่ Lover's Sacrifice (Bleed 1800 / ATK +50%)
➟ ➠ ➣ Fiendblade : Deathbringer
Defeat Specified number of NM monsters
กำจัดมอน NM 10 ตัว ในมิชชั่นระดับ 1 ขึ้นไป
**ใช้เทคนิคเดียวกันกับข้อ 3.1.1**
ได้ ดาบมือเดียว มีเอฟเฟ็คดูด HP ดรอปจาก HNM Fallen Tree ใน Aincard ชั้น 81
Fiendblade : Deathbringer (One hand sword)
Attack+30 Defense-10 STR+40
Effect : Bleeding (1800) / Attack up (+20%) / Energy Drain (HP Absorb+20%)
➟ ➠ Theatrical Gloves
Inflict specified damage total against an NM
ทำดาเมจใส่มอนระดับ NM รวม 300,000 ในมิชชั่นระดับ 1 ขึ้นไป
(ต้องมอน NM เท่านั้น HNM หรือบอสไม่ได้)
ดรอปจาก HNM Devil Strider ใน Aincard ชั้น 78
Theatrical Gloves
Defense+35 AGI+20 EVA+25
Effect : Max HP down (-35%) / Accuracy HP (ACC+30)
➟ ➠ ➣ Arcaneblade : Soul Binder
Perform specified number of sword skill
ใช้ Sword Skill 500 ครั้ง ในมิชชั่นระดับ 1 ขึ้นไป
**ใช้วิธีปั๊มแบบเดียวกับข้อ 2.1.3**
ได้ Arcaneblade : Soul Binder (Scimitar) ดรอปจาก NM Darkness ใน Aincard ชั้น 80
DEX+25 ACC+30
Effect : MAX SP down (-100) / SP gain on hit (SP absorb)
➟ ➠ ➣ Fellblade : Ruinous Doom
Defeat NM-Class monster
กำจัดมอนระดับ NM 15 ตัว ในมิชชั่นระดับ 2 ขึ้นไป
**ใช้เทคนิคเดียวกันกับข้อ 3.1.1**
ดรอปจาก HNM Elemental Lancer ใน Aincard ชั้น 83
Fellblade : Ruinous Doom (Scimitar)
Attack +20 Defense-25 ACC+20
Effect : Periodically reduce party member HP (regen -3%)/Attack up (ATK+50%)
➟ ➠ ➣ Deathglutton : Epetamu
Defeat specfied number of boss or HNM monster
กำจัดมอนระดับบอส หรือ HNM จำนวน 15 ตัว ในมิชชั่นระดับ 3 ขึ้นไป
ได้ Deathglutton : Epetamu (Scimitar) ดรอปจาก HNM Skeleton Brain ใน Aincard ชั้น 99
Attack+30 EVA+40
Effect : Max HP down (80%)/Attack up (+100%)/Energy drain (20% HP absorb)
=======*•-•*=======


➟ Assessment - Ideal Values for Attack Speed/Count
Reach set number for Extra Auto-Attack effect
ปล่อยตี Auto จนครบจำนวน 150 ครั้ง (บัฟเพิ่ม Attack Speed จะได้ทำจบไว ๆ) ในมิชชั่นระดับ 1 ขึ้นไป
ปลดล็อคระดับต่อไป ได้ Hollow Point เป็นรางวัล
➟ ➠ Effect Assessment - Outliner Spectrum
Inflict specified damage total with extra auto-attack
ใช้ผลของเอฟเฟ็คสกิลนี้ (มีให้ตอนทำ) โจมตีอัตโนมัติ 10,000 ดาเมจ ในมิชชั่นระดับ 1 ขึ้นไป
ได้บัฟ Outliner Spectrum
ผล Exact Auto-Attack +6 / ACC -15
➟ ➠ ➣ Spiralblade : Rendering Fail
Inflict specified damage total
ทำดาเมจรวม 600,000 ในมิชชั่นระดับ 1 ขึ้นไป
ได้ Spiralblade : Rendering Fail (Rapier) ดรอปจาก NM Ant Princess ใน Aincrad ชั้น 84
Attack +35 Defense -20
Effect : Extra Auto-Attack +20
➟ ➠ ➣ ➢ Glimmerblade : Banishing Ray
Compete set no. of Exact Onslaughts against NM
ใช้สกิล Onslaughts (สตัน) ใส่มอนระดับ NM จำนวน 120 ครั้ง ในมิชชั่นระดับ 2 ขึ้นไป
ได้ Glimmerblade : Banishing Ray ดรอปจาก NM Scarlet Beak ใน Aincrad ชั้น 93
VIT-30 DEX+40
Effect : Extra Auto-Attack +3% / ACC -30 / Skill Charge -50%
➟ ➠ ➣ ➢ ➤ Unlock - New Skill, Valkyrie Nights
Perform specified number of sword skill test
ใช้ Sword Skill จำนวน 300 ครั้ง
**ใช้วิธีปั๊มแบบเดียวกับข้อ 2.1.3**
ได้สกิลใหม่ของดาบ Rapier
=======*•-•*=======
➟ Field Test - Advantageous Attack Speed Differences
Test ATK Speed Down on set no. of Lv.80+ foes
ใช้ท่า Skill โจมตีที่ส่งผล DeBuff ลด Attack Speed ใส่ศัตรูเลเวล 80 ขึ้นไป 15 ครั้ง ในมิชชั่นระดับ 1 ขึ้นไป
Skill ที่ส่งผลต่อ Attack Speed Down อยู่ในสายอาวุธหอก ชื่อ Sonic Charge แน่นอนว่า ไปใส่หอก แล้วตั้งสกิลนี้ก่อนจะไปทำ
ปลดล็อคระดับต่อไป ได้ Hollow Point เป็นรางวัล
=======*•-•*=======

➟ Assessment - Uncapped Weapon Damage Value
Gather data by inflicting specified damage total
ทำดาเมจการโจมตีรวม 250,000 ในมิชชั่นระดับ 1 ขึ้นไป
ปลดล็อคระดับต่อไป ได้ Hollow Point เป็นรางวัล
➟ ➠ Vendors - Damage-Influencing Equipment
Gather Data on auto-attack accuracy
ปล่อยตี Auto จำนวน 1,000 ครั้ง ในมิชชั่นระดับ 1 ขึ้นไป
ได้ไอเท็ม Damage-Influencing Equipment มีขายที่ชั้น 82
ผล Double Attack / ATK Delay -50% / ACC +50 / ATK 0
➟ ➠ ➣ Effect Assessment - Bloody Servant
Gather data by inflicting specified damage total
ทำดาเมจรวม 1,000,000 ในมิชชั่นระดับ 1 ขึ้นไป
ได้สกิลบัฟใหม่ ผล 2% DMG Boots on low HP / 1800 Bleed
➟ ➠ ➣ ➢ Fellaxe : Demon's Scythe
Defaeat specified number of NM monsters
กำจัดมอนประเภท NM 20 ตัว ในมิชชั่นระดับ 2 ขึ้นไป
**ใช้เทคนิกเดียวกันกับข้อ 3.1.1**
ได้ ขวาน Fellaxe : Demon's Scythe ดรอปจาก HNM Death Mushroom ใน Aincrad ชั้น 86
Attack+20 VIT-40 ACC+10
Effect : 2% DMG boots on low HP
➟ ➠ ➣ ➢ ➤ Unlock - New Skill, Disaster Hollow
Perform specified number of Sword Skill tests
ใช้ Sword Skill จำนวน 300 ครั้ง ในมิชชั่นระดับ 2 ขึ้นไป
**ใช้วิธีปั๊มแบบเดียวกับข้อ 2.1.3**
ได้สกิลขวานใหม่
=======*•-•*=======


➟ Adjustment Plan - Favoring Attack over Defense
Receive specified damage total
รับดาเมจรวม 250,000 (ยืนนิ่ง ๆ ให้มอนรุมตีไปเถอะ) ในมิชชั่นระดับ 1 ขึ้นไป
ปลดล็อคระดับต่อไป ได้ Hollow Point เป็นรางวัล
ถ้าอยากได้แบบเร่งด่วน ไปหาพวกบอสที่มีลูกน้องเยอะ ๆ (ระวังตายด้วยล่ะ)

➟ ➠ Effect Assessment - Mail Plate
Receive specified damage total
รับดาเมจรวม 500,000 ในมิชชั่นระดับ 1 ขึ้นไป (เหมือนข้อบน)
ได้บัฟใหม่ DEF50% / ATK 30% / Enemy Target DEF -50%
➟ ➠ ➣ Crusher : Bond Cyclone
Inflict specified damage total against Lv120+ foes
ทำดาเมจรวม 800,000 ใส่มอนสเตอร์เลเวล 120 ขึ้นไป ในมิชชั่นระดับ 1 ขึ้นไป
ได้ขวาน Crusher : Bond Cyclone ดรอปจาก NM Emerald Dragon ใน Aincrad ชั้น 85
Attack+30 STR+40 VIT+30 AGI-10 ACC+10 EVA10
Effect : ATK+50% / DEF-50%
➟ ➠ ➣ ➢ Crimson Gauntlets
Inflict specified damage total against Lv130+ foes
ทำดาเมจรวม 1,000,000 ใส่มอนเลเวล 130 ขึ้นไป ในมิชชั่นระดับ 1 ขึ้นไป
ได้ถุงมือ Crimson Gauntlets ดรอปจาก NM Gluttonous Rafflesia ใน Aincrad ชั้น 88
DEF+40 STR+42 VIT-5 AGI-20
Effect : Ignore DEF / DEF -50% / HATE+30% (ไม่สนใจพลังป้องกันของเป้าหมาย)
➟ ➠ ➣ ➢ ➤ Ragnarok's Bane : Headsman
Inflict specified damage total against Lv140+ foes
ทำดาเมจรวม 1,200,000 ใส่มอนเลเวล 140 ขึ้นไป ในมิชชั่นระดับ 1 ขึ้นไป
ได้ขวาน Ragnarok's Bane : Headsman ดรอปจาก HNM Ark Knight ใน Aincrad ชั้น 94
Attack+100 STR+100 VIT-50 ACC+20
Effect : Ignore DEF / DEF 0 / +2% Damage on low HP/HATE+50%
=======*•-•*=======

➟ Plan - Enhancing Defense Effects
Clear specified number of Hollow Missions
ทำมิชชั่นระดับ 1 ขึ้นไปผ่าน 5 ครั้ง
ปลดล็อคระดับต่อไป ได้ Hollow Point เป็นรางวัล
➟ ➠ Horrorwyrm Gauntlets
Perfrom a set number of parries successfully
ใช้สกิล Parry จำนวน 20 ครั้ง ในมิชชั่นระดับ 1 ขึ้นไป
ได้ถุงมือ Horrorwyrm Gauntlets ดรอปจาก HNM Plagued Strider ใน Aincrad ชั้น 76
Horrorwyrm Gauntlets
Defense+40 STR-10 VIT+25 ACC+10
Effect : DEF+20%/MAX SP-100
➟ ➠ ➣ Netherworld Undead Shield
Inflict specified damage total with auto-attacks
ใช้ Auto Attack โจมตีรวม 500,000 ดาเมจ ในมิชชั่นระดับ 1 ขึ้นไป
ได้ โล่ Netherworld Undead Shield ดรอปจาก NM Bloody Wasp ใน Aincrad ชั้น 96
Netherworld Undead Shield
Defense+120 STR+15 Poison+30 Paralysis+30 Bleeding+30
Effect : DEF+15%/MAX SP-100/10% HP Absorb
➟ ➠ Effect Assessment - Nightly Divine
Receive Specified damage total
รับดาเมจ 800,000 ในมิชชั่นระดับ 1 ขึ้นไป
ได้สกิลบัฟใหม่ (ใช้ได้เมื่อถือโล่เท่านั้น)
➟ ➠ ➣ Ares Armor
Recieve set number of critical hits from enemies
รับการโจมตีประเภทคริติคอลจากศัตรู 100 ครั้ง ในมิชชั่นระดับ 1 ขึ้นไป
(แนะนำไปลากมอนมาเยอะ ๆ จะไปมิชชั่นลูกโคบอลท์ หรือไปหามอนประเภทผีถือเคียวก็ได้)
ได้ Ares Armor ดรอปจาก NM Zian Lizardman ใน Aincrad ชั้น 79
Ares Armor
Defense+130 VIT+50 AGI+10 ACC-20 EVA+10
Effect : DMG Reduction +20%/BST Recovery -2 (ลดดาเมจลง 20% และลดการฟื้นฟูเกจ Burst ลง 2)
➟ ➠ ➣ ➢ Aegis Shield
Complete set no. of Hollow Mission with Low Risk
จบมิชชั่นระดับ 2 ขึ้นไปด้วยค่า Risk ต่ำ ๆ (ไปกะ Partner หรือไปเป็นกลุ่ม เข้ามิชชั่น โจมตี แล้ว Step ออกมายืนรอค่า Risk ลด รอเพื่อนฆ่ามอนมิชชั่นตายก็ได้)
ได้ Aegis Shield ดรอปจาก NM Impregnable ใน Aincrad ชั้น 90
Aegis Shield
Attack+10 Defense+125 VIT+10 ACC+10 Poison+35 Paralysis+35 Bleeding+35
Effect : Risk-3/Max BST -250
➟ ➠ ➣ ➢ ➤ Unlock - New Skill, Carnage Alliance
Perform specified number of sword skill tests
ใช้ Sword Skill 300 ครั้ง ในมิชชั่นระดับ 2 ขึ้นไป
**ใช้วิธีปั๊มแบบเดียวกับข้อ 2.1.3**
ได้สกิลใหม่ของดาบมือเดียว Carnage Alliance
=======*•-•*=======


➟ Implementation Research - Risk-Focused Equipment
Quick-Step from set no. of attack with <1 Risk
ใช้ Quick Step (หลบทางไหนก็ได้ ซ้าย ขวา หรือถอย ถ้าทำสำเร็จจะมีเอฟเฟ็คแสงและได้โบนัสแตกต่างกันออกไป) ด้วยค่า Risk ต่ำกว่า 1 จำนวน 15 ครั้ง ในมิชชั่นระดับ 1 ขึ้นไป
(*เทคนิค* ถ้าเลเวลยังไม่สูงมาก ไปทำกับพวกผึ้งใน Sea of trees area at Serpentis เข้ามิชชั่นไหนก็ได้ที่มีผึ้งในแผนที่ แล้วรอจังหวะมันใช้สกิลเหล็กใน กดหลบให้ถูกจังหวะ)
ปลดล็อคระดับต่อไป ได้ Hollow Point เป็นรางวัล
➟ ➠ Effect Assessment - Protect Burst
Reflec set no, of attack against Lv.110+ enemies
สะท้อนการโจมตีของมอนเลเวล 110 ขึ้นไป 250 ครั้ง ในมิชชั่นระดับ 1 ขึ้นไป
(ใช้บัฟที่สะท้อนการโจมตีช่วย)
ได้สกิลใหม่ของโล่
➟ ➠ ➣ Fayblade : Tizona
Defeat Lv.120+ enemies
กำจัดมอนเลเวล 120 ขึ้นไป 300 ตัว ในมิชชั่นระดับ 1 ขึ้นไป
(ไปมิชชั่นโคบอลท์ 666 ตัวเลย ถ้าเลเวลมันไม่ถึง 120 แนะนำให้ไปจบ Aincrad ก่อนสัก 1-2 รอบ)
ได้ดาบ Fayblade : Tizona ดรอปจาก HNM Evolved Hornet ใน Aincrad ชั้น 83
Fayblade : Tizona
ACC+30
Effect : Risk Down -3 / ATK -100%
➟ ➠ ➣ ➢ Aurumbrand : Hauteclaire
Use set no. of burst attack against Lv130+ foes
ใช้ Burst Attack กับมอนเลเวล 130 ขึ้นไปจำนวน 300 ตัว ในมิชชั่นระดับ 2 ขึ้นไป
(มิชชั่นโคบอลท์ 666 ตัว)
ได้ดาบ Aurumbrand : Hauteclaire ดรอปจาก NM Lord of Wind ใน Aincrad ชั้น 92
Aurumbrand : Hauteclaire
Attack-10 Defense+30 VIT+35
Effect : DMG Reduction +20% / DEF+20% / Burst Recovery -3
➟ ➠ ➣ ➢ ➤ Godblade : Dragonslayer
Defeat specified number of boss or HNM monsters
กำจัดบอส หรือ HNM จำนวน 15 ตัว ในมิชชั่นระดับ 3 ขึ้นไป
ได้ดาบ Godblade : Dragonslayer ดรอปจาก HNM Abased Beast ใน Aincrad ชั้น 85
Godblade : Dragonslayer
Attack+35 STR+40 ACC+25
Effect : Risk -5 / Max Burst -250 / Extra Damage to Dragon
=======*•-•*=======


➟ SP Usage Research
Activate SP absorb effect a set number of times
ใช้ Effect ดูด SP จำนวน 300 ครั้ง ในมิชชั่นระดับ 1 ขึ้นไป
(จริง ๆ อันนี้ไปยืนปล่อยตี Auto ก็ขึ้นแล้ว)
ปลดล็อคระดับต่อไป ได้ Hollow Point เป็นรางวัล
➟ ➠ Imperial Jade Magatama
SP absorb from a Lv.110+ enemy a set no. of times
ได้รับ SP จากมอนเลเวล 110 ขึ้นไป (เป็น Effect ของสร้อยที่ใส่ตอนทดสอบ) จำนวน 100 ครั้ง ในมิชชั่นระดับ 1 ขึ้นไป
ได้สร้อย Imperial Jade Magatama ดรอปจาก NM Crimson Spinner ใน Aincrad ชั้น 76
Imperial Jade Magatama
Defense+10 STR+10 VIT+5 ACC+5
Effect : SP absorb+1 / Burst recovery -1
➟ ➠ ➣ Gods' Libation
Use set no. of burst attacks against Lv110+ foes
ใช้ Burst Attack กับมอนเลเวล 110 ขึ้นไป 500 ครั้ง ในมิชชั่นระดับ 1 ขึ้นไป
Gods' Libation มีขายที่ชั้น 84
➟ ➠ ➣ ➢ Unlock New Skill, Akatsukirei
Perfrom specified number of sword skill tests
ใช้ Sword Skill 300 ครั้ง ในมิชชั่นระดับ 2 ขึ้นไป
**ใช้วิธีปั๊มแบบเดียวกับข้อ 2.1.3**
ได้สกิลใหม่ของดาบคาตานะ
➟ ➠ ➣ ➢ ➤ Effect Assessment - Cool. Calm. and Collected
Test out set no. of chain using sword skills
ใช้การ Chain Sword Skill จำนวน 100 ครั้ง ในมิชชั่นระดับ 2 ขึ้นไป
ได้สกิลบัฟใหม่
=======*•-•*=======


➟ Attack-Oriented Usage of SP
Defeat set number of Lv.110+ NM/HNM monster
กำจัดมอนระดับ NM/HNM จำนวน 5 ตัว ในมิชชั่นระดับ 1 ขึ้นไป
**ใช้เทคนิคเดียวกันกับข้อ 3.1.1**
ปลดล็อคระดับต่อไป ได้ Hollow Point เป็นรางวัล
➟ ➠ Effect Assessment - Dark Flare
Use set no. of sword skill against Lv110+ monsters
ใช้ Sword Skill จำนวน 300 ครั้งใส่มอนเลเวล 110 ขึ้นไป ในมิชชั่นระดับ 1 ขึ้นไป
**ใช้วิธีปั๊มแบบเดียวกับข้อ 2.1.3**
ได้บัฟใหม่ เพิ่ม MAX SP 300 / Bleed 1800 / Risk+3
➟ ➠ ➣ Jato : Onikiri-maru
Use set no. of burst attack against Lv120+ foes
ใช้ Burst Attack ใส่มอนเลเวล 120 ขึ้นไป ในมิชชั่นระดับ 1 ขึ้นไป
ได้ดาบ Jato : Onikiri-maru ดรอปจาก HNM Ant Knight ใน Aincrad ชั้น 80
Jato : Onikiri-maru
DEX+25 ACC+40 EVA-10
Effect : MAX SP-300 / Burst Recovery up / ATK+80
➟ ➠ ➣ ➢ Yato - Masamune
Inflict specified damage total against Lv130+ foes
ทำดาเมจรวม 1,000,000 ใส่มอนเลเวล 130 ขึ้นไป ในมิชชั่นระดับ 2 ขึ้นไป
ได้ดาบ Yato - Masamune ดรอปจาก NM Blaze Armor
Yato - Masamune
Attack+40 STR+40
Effect : MAX Burst -500 / 500 Bleed / SP Linked Attack (การโจมตีใช้ SP เพิ่มความแรง)
➟ ➠ ➣ ➢ ➤ Shinto : Ama-no-Murakumo
Evade a set no. of enemy attacks by means
หลบการโจมตีของมอน ในมิชชั่นระดับ 3 ขึ้นไป
ได้ Shinto : Ama-no-Murakumo (Katana) ดรอปจาก HNM Ferocious Beast ใน Aincrad ชั้น 95
Shinto : Ama-no-Murakumo
AGI+30 ACC+10 EVA+50
Effect : SP Linked ATK / SP Recovery on Evade
=======*•-•*=======


➟ Development - Techniqes to Gain Protection
Shield block Lv.80+ enemies a set number of times
ใช้โล่ป้องกันการโจมตีของมอน เลเวล 80 ขึ้นไป จำนวน 50 ครั้ง ในมิชชั่นระดับ 1 ขึ้นไป
ปลดล็อคระดับต่อไป ได้ Hollow Point เป็นรางวัล
➟ ➠ Thessarian Meal
Use special recover to restore set amount of HP
ใช้การฟื้นฟู HP แบบพิเศษ 500 ครั้ง ในมิชชั่นระดับ 1 ขึ้นไป
(วิธีง่าย ๆ คือ ใส่ของติด Bleed ใช้บัฟติด Bleed แล้วใส่ของ Regen HP หรือบัฟ Regen HP แล้วไปยืนนิ่ง ๆ ใน Mission จนครบ)
ได้ยา Thessarian Meal มีขายในชั้น 85
Regen HP +3000 / ATK -50% (น่าซื้อมาใช้สัส ๆ)
➟ ➠ ➣ Vigor Potion
Use special recover to restore set amount of HP
ใช้การฟื้นฟู HP แบบพิเศษ 800 ครั้ง ในมิชชั่นระดับ 1 ขึ้นไป
(วิธีง่าย ๆ คือ ใส่ของติด Bleed ใช้บัฟติด Bleed แล้วใส่ของ Regen HP หรือบัฟ Regen HP แล้วไปยืนนิ่ง ๆ ใน Mission จนครบ)
ได้ยา Vigor Potion มีขายในชั้น 87
Max HP+50% / Regen +300 / ATK-50%
➟ ➠ Mace of Asclepius
Recieve special HP recover effect a set no. of times
ได้รับการฟื้นฟู HP แบบพิเศษ 1,000 ครั้ง ในมิชชั่นระดับ 2 ขึ้นไป
(วิธีง่าย ๆ คือ ใส่ของติด Bleed ใช้บัฟติด Bleed แล้วใส่ของ Regen HP หรือบัฟ Regen HP แล้วไปยืนนิ่ง ๆ ใน Mission จนครบ)
ได้ Mace of Asclepius ดรอปจาก NM Goblin Leader ใน Aincrad ชั้น 77
Mace of Asclepius (One-Handed Club)
Defense+35 VIT+25 ACC+30
Effect : HP Recovery +30 / DEF -20%
➟ ➠ ➣ Unlock - New Skill, Heart Beat Stopper
Perfrom specified number of sword skill tets
ใช้ Sword Skill 300 ครั้ง ในมิชชั่นระดับ 2 ขึ้นไป
**ใช้วิธีปั๊มแบบเดียวกับข้อ 2.1.3**
ได้สกิลใหม่ของ Club
➟ ➠ Effect Assessment - Shiny Hollow
Auto-evade a set no. of Lv100+ enemy attacks
หลบการโจมตีของมอนเลเวล 100 ขึ้นไป (โดนโจมตี miss) 100 ครั้ง ในมิชชั่นระดับ 1 ขึ้นไป
ได้บัฟใหม่
➟ ➠ ➣ Infinite Ourboros
Receive specified damage total
รับดาเมจรวม 500,000 ในมิชชั่นระดับ 1 ขึ้นไป
ได้ Infinite Ourboros ดรอปจาก HNM Dancing Anemoe ใน Aincrad ชั้น 79
Infinite Ourboros (One-Handed Club)
Defense+40 VIT+30 EVA-20
Effect : Periodic barrier effect / Burst Gauge Recovery -2
➟ ➠ ➣ ➢ Priestelle's Boon
Get Poisoned by Lv.120+ enemies a set no. of times
รับการติดพิษจากมอนเลเวล 120 ขึ้นไป จำนวน 40 ครั้ง ในมิชชั่นระดับ 2 ขึ้นไป
ได้ชุด Priestelle's Boon ดรอปจาก HNM Lizard Diver ใน Aincrad ชั้น 92
Priestelle's Boon (Armor)
Defense+100 STR-20 VIT+30 AGI+5 ACC+10 EVA+20 Poison+50 Paralysis+50 Bleeding+50
Effect : Debuff Clone/Regen+100
➟ ➠ ➣ ➢ ➤ Starmace : Elysium
Recieve special HP recovery effect a set no. of times
ได้รับการฟื้นฟู HP แบบพิเศษ 1,000 ครั้ง ในมิชชั่นระดับ 3 ขึ้นไป
(วิธีง่าย ๆ คือ ใส่ของติด Bleed ใช้บัฟติด Bleed แล้วใส่ของ Regen HP หรือบัฟ Regen HP แล้วไปยืนนิ่ง ๆ ใน Mission จนครบ)
ได้ Starmace : Elysium ดรอปจาก HNM Shining Ant Breaker ใน Aincrad ชั้น 88
Starmace : Elysium (One-Handed Club)
Defense+50 VIT+40 ACC-20
Effect : Debuff Clone/Can't be interrupted (ไม่ชะงัก) / Skill Charge time -30% / HP Recovery +20%
=======*•-•*=======


➟ Evening the Ods against Powerful Enemies
Reduce Lv.80+ enemy parameters a set no. of times
ใช้สกิลลดค่าสเตตัส (Debuff) ใส่มอนเลเวล 80 ขึ้นไป จำนวน 10 ครั้ง ในมิชชั่นระดับ 1 ขึ้นไป
(พวกสกิลดาบจะมี Effect ดีบัฟ ใช้ท่านั้นใส่มอน)
ปลดล็อคระดับต่อไป ได้ Hollow Point เป็นรางวัล
➟ ➠ Demoness's Teardrop
Inflict Darkness on Lv.85+ enemies a set no. of times
ใช้สกิลที่ส่งผลให้เกิด Darkness (ตาบอด) ใส่มอนเลเวล 85 ขึ้นไป 20 ครั้ง ในมิชชั่นระดับ 1 ขึ้นไป
(พวกสกิลดาบจะมี Effect Darkness ใช้ท่านั้นใส่มอน)
ได้สร้อย Demoness's Teardrop ดรอปจาก HNM Sonic Wyvern ใน Aincrad ชั้น 77
Demoness's Teardrop
Defense+5 STR+15 EVA+10
Effect : Debuff Accuracy up / Accuracy down
➟ ➠ ➣ Demonspear : Gae Blog
Reduce Lv.90+ enemy parameter a set no. of times
ใช้สกิลลดค่าสเตตัส (Debuff) ใส่มอนเลเวล 90 ขึ้นไป จำนวน 25 ครั้ง ในมิชชั่นระดับ 1 ขึ้นไป
(พวกสกิลดาบจะมี Effect ดีบัฟ ใช้ท่านั้นใส่มอน)
ได้หอก Demonspear : Gae Blog ดรอปจาก NM Arboreal Fear ใน Aincrad ชั้น 83
Demonspear : Gae Blog
Attack+30 AGI+20 EVA+5
Effect : Debuff Accuracy up / MAX SP-50% / True Strike (โจมตีไม่มีทางพลาด)
➟ ➠ ➣ ➢ Effect Assessment - Curse Prey
Inflict Bleed on Lv.100+ enemies a set no. of times
ใช้สกิลที่ส่งผลให้เกิด Bleed (เลือดไหล) ใส่มอนเลเวล 100 ขึ้นไป 75 ครั้ง ในมิชชั่นระดับ 2 ขึ้นไป
(พวกสกิลหอกและดาบคาตานะจะมี Effect Bleed ใช้ท่านั้นใส่มอน)
ได้สกิลบัฟใหม่ (เพิ่มระดับ Debuff ของมอนที่โดนอยู่)
➟ ➠ ➣ ➢ ➤ Unlock - New Skill, Judgement Piecer
Therefrom specified number of sword skill tests
ใช้ Sword Skill จำนวน 300 ครั้ง ในมิชชั่นระดับ 2 ขึ้นไป
**ใช้วิธีปั๊มแบบเดียวกับข้อ 2.1.3**
ได้สกิลหอก ใหม่
➟ ➠ ➣ ➢ ➤ Noble Carmalite Sash
Recieve Parameter debuff a set number of times
รับดีบัฟ ลดพารามิเตอร์ จากมอน 40 ครั้ง (ไปหาพวกบอสเลย เยอะแยะ) ในมิชชั่นระดับ 1 ขึ้นไป
ได้เข็มขัด Noble Carmalite Sash ดรอปจาก NM Abaddon Knight ใน Aincrad ชั้น 97
Noble Carmalite Sash
Defense+10 AGI+10 ACC+20 EVA+10
Effect : Debuff Accuracy up / ATK -10%
➟ ➠ ➣ ➢ ➤ Recluse's Cape
Recieve Bleed from enemies a set no. of times
รับดีบัฟ Bleed จากมอน 40 ครั้ง (ไปบอส Reaper เลย โดนแน่นอน) ในมิชชั่นระดับ 1 ขึ้นไป
ได้ผ้าคลุม Recluse's Cape ดรอปจาก HNM Chaos Wizard ใน Aincrad ชั้น 87
Recluse's Cape
Defense+5 STR+5 VIT+20 ACC+20
Effect : Debuff Accuracy up / DEF -10%
➟ ➠ ➣ ➢ ➤ Stasis Evil Eye
Recieve Poison from enemies a set no. of times
รับดีบัฟ Poison จากมอน 40 ครั้ง (ไปบอสแมลงพวก Queen เลย โดนแน่นอน) ในมิชชั่นระดับ 1 ขึ้นไป
ได้ Stasis Evil Eye ดรอปจาก HNM Rafflesia Chaser
Stasis Evil Eye
Defense+5 DEX+10 ACC+10 EVA+10
Effect : Debuff Accuracy up / Max Burst -500
➟ ➠ ➣ ➢ ➤ Sainspear : Rhongomyniad
Reduce Lv.120+ enemy parameter a set no.. of times
ใช้สกิลลดค่าสเตตัส (Debuff) ใส่มอนเลเวล 120 ขึ้นไป จำนวน 100 ครั้ง ในมิชชั่นระดับ 2 ขึ้นไป
(หาพวกสกิลดาบที่มี Effect ดีบัฟ ใช้ท่านั้นใส่มอน)
ได้หอก Sainspear : Rhongomyniad ดรอปจาก HNM Chaos Lantern
Sainspear : Rhongomyniad
Defense-20 DEX+50 ACC+20
Effect : Debuff Accuracy up / HP Regen +100/DEF and ATK Delay -20%
➟ ➠ ➣ ➢ ➤ ➥ Godspear : Gungnir
Inflict specified damage total against to 140+ foes
ทำดาเมจรวม 2,000,000 ดาเมจใส่มอนเลเวล 140 ขึ้นไป ในมิชชั่นระดับ 3 ขึ้นไป
ได้หอก Godspear : Gungnir ดรอปจาก HNM Perfect Guardian ใน Aincrad ชั้น 98
Godspear : Gungnir
STR+20 VIT+20 AGI+20 DEX+20 ACC+40 EVA+10
Effect : Debuff Accuracy up / SP Regen+3 / SP-Linked Attack / DEF-20%
=======*•-•*=======


➟ Enhancement of Evasive Action
Auto-Evade a set no. of Lv.100+ enemy attacks
พูดง่าย ๆ คือ โดนโจมตีแล้ว miss = auto evade จำนวน 50 ครั้ง ในมิชชั่นระดับ 1 ขึ้นไป
ปลดล็อคระดับต่อไป ได้ Hollow Point เป็นรางวัล
➟ ➠ Unlock - New Skill, Sweet Revenge
Perfrom specified number of sword skill tests
ใช้ Sword Skill จำนวน 300 ครั้ง ในมิชชั่นระดับ 1 ขึ้นไป
**ใช้วิธีปั๊มแบบเดียวกับข้อ 2.1.3**
ได้สกิลของดาบใหญ่ใหม่
➟ ➠ ➣ Effect Assessment - Demon Insider
Counter Lv.110 enemies a set number of times
ใช้ Counter กับมอนเลเวล 110 ขึ้นไป ในมิชชั่นระดับ 1 ขึ้นไป
(จะมาอัพเดททีหลัง)
ได้สกิลใหม่
➟ ➠ ➣ ➢ Crimson Armor
Regain SP from evading a set number of times
ฟื้นฟู SP จากการหลบ 300 ครั้ง ในมิชชั่นระดับ 2 ขึ้นไป
(เข้ามิชชั่นไปมันจะใส่ชุดนี้ให้ มีเอฟเฟคฟื้น SP จากการหลบ โดนจมโตี miss อยู่แล้ว)
ได้ Crimson Armor ดรอปจาก NM Necromancer ใน Aincrad ชั้น 86
Crimson Armor
Attack+10 Defense+150 STR+20 VIT-10 DEX+10 EVA+30 Poison+7 Paralysis+7 Bleeding+7
Effect : SP Gain on Dodge / DEF -30%
➟ ➠ ➣ ➢ ➤ Shadow Greaves
Evade skill with Exact Back-Step a set no. of times
หลบการโจมตีจากด้านหลัง? (หรือยังไง จะมาอัพเดทอีกที) 1000 ครั้ง ในมิชชั่นระดับ 2 ขึ้นไป
ได้ Shadow Greaves ดรอปจาก HNM Maga Mite ใน Aincrad ชั้น 99
Shadow Greaves
Defense+35 STR-20 VIT-20 AGI+50 EVA+50
Effect : Cri+10% / EVA+10% / Movement Speed -10%
=======*•-•*=======
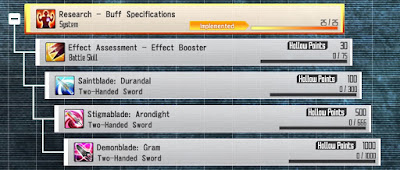

➟ Research - Buff Specifications
Buff your own attack speed a set number of times
ใช้บัฟเพิ่ม Attack Speed จำนวน 25 ครั้ง ในมิชชั่นระดับ 1 ขึ้นไป
ปลดล็อคระดับต่อไป ได้ Hollow Point เป็นรางวัล
➟ ➠ Effect Assessment - Effect Booster
Activate Hate-Modifying effects a set no. of times
ใช้สกิล หรือไอเท็ม ที่ส่งผลกับค่า Hate หรือทำให้ค่า Hate เปลี่ยนแปลง (จะมาอัพเดทอีกที) ในมิชชั่นระดับ 1 ขึ้นไป
ได้สกิลใหม่ ส่งผลให้เอฟเฟ็คของสกิลนานขึ้น (SP Regen -5)
➟ ➠ ➣ Saintblade : Durandal
Recieve set no. of breath attacks from Lv.120+ foes
รับการโจมตีประเภท Breath (ลมหายใจ ควัน หมอก) จากศัตรู 300 ครั้ง (ไปดูพวกมังกร หรือตัวอื่น ๆ ที่โจมตีประเภทนี้) ในมิชชั่นระดับ 1 ขึ้นไป
ได้ Saintblade : Durandal ดรอปจาก NM Night Stalker ใน Aincrad ชั้น 87
Saintblade : Durandal (Two-handed Sword)
Defense+50 VIT+30
Effect : Nullify breath (การโจมตีด้วย breath ไม่มีผล) / Nullify CRT (การโจมตีแบบคริติคอลไม่มีผล) / DEF+20%
➟ ➠ ➣ ➢ Stigmablade : Arondight
Inflict set no. of critical hits to Lv130+ foes
โจมตีคริติคอลใส่มอนเลเวล 130 ขึ้นไป ในมิชชั่นระดับ 2 ขึ้นไป
(ใช้บัฟเพิ่มคริ หรืออาวุธที่เพิ่มคริก็ได้)
ได้ Stigmablade : Arondight ดรอปจาก NM Gaia Breaker ใน Aincrad ชั้น 95
Stigmablade : Arondight (Two-Handed Sword)
STR+30 VIT+30 AGI+30 DEX+30
Effect Reduce Skill Charge Time / Shorten Attack Delay / ACC-50%
➟ ➠ ➣ ➢ ➤ Demonblade : Gram
Inflict set no. of critical hits to Lv.140+ foes
โจมตีคริติคอลใส่มอนเลเวล 140 ขึ้นไป ในมิชชั่นระดับ 3 ขึ้นไป
(ใช้บัฟเพิ่มคริ หรืออาวุธที่เพิ่มคริก็ได้)
ได้ Demonblade : Gram ดรอปจาก HNM Eternal Dragon ใน Aincrad ชั้น 96
Demonblade : Gram (Two-Handed Sword)
Attack+100 Defense-50 STR+50 EVA-25
Effect : True Strike (โจมตีไม่มีวันพลาด) / CRT Rate up+20% (อัตราคริติคอลเพิ่ม) / Defense -100%
=======*•-•*=======
Aincrad ชั้น 76th Arc Sophia
Aincrad ชั้น 77th Triberia
Aincrad ชั้น 78th Lunayde
Aincrad ชั้น 79th Iotol
Aincrad ชั้น 80th Carliana
Aincrad ชั้น 81th bagdol
Aincrad ชั้น 82th Lastea
Aincrad ชั้น 83th Dolva
Aincrad ชั้น 84th Dahios
Aincrad ชั้น 85th Nidorath
Aincrad ชั้น 86th Terrafil
Aincrad ชั้น 87th Skudzhe
Aincrad ชั้น 88th Cebera Civ
Aincrad ชั้น 89th Narsh
Aincrad ชั้น 90th Koyornos
Aincrad ชั้น 91th Ulgand
Aincrad ชั้น 92th Mishu'hem
Aincrad ชั้น 93th Tchiguani
Aincrad ชั้น 94th Gykard
Aincrad ชั้น 95th Celes
Aincrad ชั้น 96th Virtus
Aincrad ชั้น 97th Philquia
Aincrad ชั้น 98th Hainscht - 99th Town of Endings - 100th Ruby Palace
Hollow Area : Selvendys Forest Area
Hollow Area : Bastia Gate Floating Ruins Area
Hollow Area : Graceleaf Bay Area
Hollow Area : Diogeer Skycaves Area
Sword Art Online Hollow Fragment : Implement Guide (บทความหน้านี้ที่กำลังอยู่)
Hollow Area : Grand Quest
ถามอะไรหน่อยครับ
ตอบลบคือจะทำ30% Recast Reduction on Chaining Sword Skills แต่sp เด้งไม่ทันทำยังไงครับ
บัฟเด้ง SP สร้อยเด้ง SP ฯลฯ เยอะแยะ
ลบ